One of the reasons why FreeBSD fans are not very fond of OVH is the fact that networking will simply not work out of the box when you create a virtualization guest. In my case I have used Proxmox, but these instructions should work with any other virtualization host.
Installing FreeBSD is otherwise very straightforward and I won’t cover that here as it’s mostly a matter of repeatedly pressing enter; likewise, it doesn’t really matter which version of FreeBSD you are using. What matters is: as soon as we get to that dreaded question – “Would you like to configure IPv4/6 for this interface?” – the only sensible answer with OVH is a big NO. And that’s not because we do not want to configure the network, but because it will not work if we do it through the freebsd-setup interface and we will be just wasting our time.
So instead, once we get to the end of the installation process and find ourselves in the Final Configuration screen, we will choose Exit and answer Yes to the question (“would you like to open a shell in the new system to make some manual modifications?”) and then proceed to get our hands dirty.
Let’s first make sure we have the following data at hand:
- Our IP address, belonging to a block we previously added as a “Failover IP” to our dedicated server in the OVH site.
- The gateway IP. This is the same as the IP of the dedicated server acting as host of our VM, except for the last digit which is always 254. So if your dedicated server’s IP is 144.113.17.118, for example, your VM’s gateway address will be 144.113.17.254
- OVH’s name server IP, that’s easy because it’s always 213.186.33.99
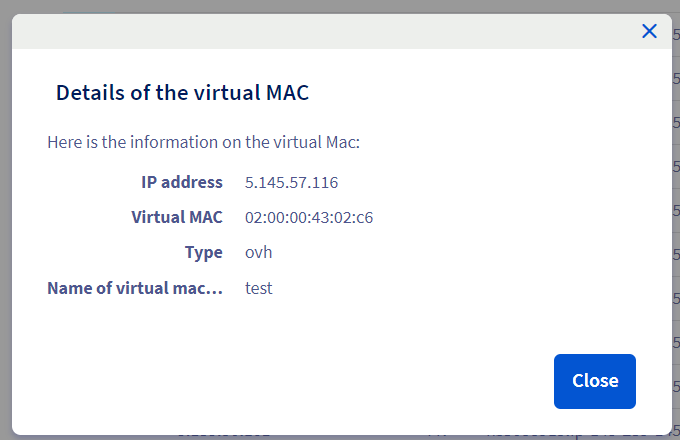
And, of course, you will have added the virtual MAC address you created through the OVH IP menu (“create a virtual MAC address”) in the virtual machine itself. Without this, networking will not work at all.

Once in the shell, it’s time to edit our /etc/rc.conf file and add a few things. Let’s assume we chose VirtIO as our network controller so our network interface is vtnet0. If you are not sure about this, feel free to use the ifconfig command in the shell to find out.
ifconfig_vtnet0="inet <our_ip> netmask 255.255.255.255 broadcast <our_ip>"
static_routes="gw1 gw2"
route_gw1="<gateway_ip>/32 -interface vtnet0"
route_gw2="default <gateway_ip>"
Saveand create a new file named /etc/resolv.conf which will simply contain this:
nameserver 213.186.33.99Now if you previously chose to install local unbound during the OS setup (which I highly recommend for performance reasons) you should run this command to let the DNS resolver know where to forward our DNS queries:
local-unbound-setupIt’s time now to leave from this unhospitable shell and…
exitTo finally reboot into our new and (hopefully) connected FreeBSD installation. Test that networking is there:
root@test:/home/www # ping 8.8.8.8
PING 8.8.8.8 (8.8.8.8): 56 data bytes
64 bytes from 8.8.8.8: icmp_seq=0 ttl=113 time=3.128 ms
64 bytes from 8.8.8.8: icmp_seq=1 ttl=113 time=3.274 ms
64 bytes from 8.8.8.8: icmp_seq=2 ttl=113 time=3.265 ms
And make sure DNS plays along too:
root@test:/home/www # ping ka-plus.pl
PING ka-plus.pl (188.114.97.2): 56 data bytes
64 bytes from 188.114.97.2: icmp_seq=0 ttl=53 time=3.220 ms
64 bytes from 188.114.97.2: icmp_seq=1 ttl=53 time=3.182 ms
64 bytes from 188.114.97.2: icmp_seq=2 ttl=53 time=3.224 ms
If this fails, there’s a high chance you either forgot to enter the MAC address in the virtualization software of choice, or that you made a typo.It’s okay, it happens to me all the time ¯\_(ツ)_/¯
Update 4.9.22: adding IPv6 support
Yes,I know you won’t believe me -the Internet is full of horror stories about this very process- but I finally managed to setup IPv6 on a virtualization guest. The OS I used in my example is FreeBSD 13.1.
You will first need to get the IPv6 address and the IPv6 Gateway assigned to your dedicated server, which can be found below the IPv4 ones in the Network part of the General Information page for your server in the OVH panel.
Now for those people that find IPv6 scary I’m going to make this part simple. If your IPv6 address block looks like this:
2001:23d0:401:d13::/64This is not a single address but a whole block and that /64 at the end means you can choose any hexadecimal number you wish between 1 and fffe, but for simplicity let’s just use 6. So this could be your server’s IPv6 address:
2001:23d0:401:d13::6I repeat again that unlike IPv4, we are free to choose any address in that range without having to create vmacs or tell OVH anything about it. All you can do in regards to IPv6 addresses in the Client Area is to assign them a reverse DNS anyway.
Now you’re ready to add these lines to your /etc/rc.conf
ipv6_activate_all_interfaces="YES"
ipv6_default_interface="NO"
ipv6_static_routes="ovh"
ipv6_route_ovh="-host <GATEWAY_IP> -iface vtnet0"
ipv6_gateway_enable="YES"
ifconfig_vtnet0_ipv6="inet6 <IPV6_ADDRESS>/56"
ipv6_defaultrouter="<GATEWAY_IP>"
In order to put them into effect we must restart networking, which involves restarting these two services together as they depend on each other.
service netif restart & service routing restartNow let’s test our connectivity by doing a IPv6 ping:
ping6 ipv6.google.comYou should get a regular stream of ping responses. Congratulations, you’re ready for the future!
Leave a Reply